Introduction
If you’re not getting the quality of sound you had hoped for, there are actually some ways you can improve your home theater sound quality. This post will be especially helpful if you want better quality from either high end or budget speakers (or you know you could be getting better quality and don’t want to upgrade your speakers).
An important thing to know before getting started is that sound quality is determined by more factors than the quality of the speakers themselves. I definitely think you DO NOT need room tuning kits. These can be expensive and they aren’t going to tell you when you’re getting the sound quality you are hoping for.
Below is a list of the 10 best methods I’ve found that can improve your home theater sound quality. If at the end of this you feel you still aren’t getting what you want, also know that Best Buy does free, in-person consultations and they can help you out. Chances are that following the below methods are going to give you what you want and make a bigger difference than you thought!
Adjust Your Room Acoustics
Try this first: Clap your hands and listen for an echo.

If you can hear any sort of echo or ambiance, it means you need more padding in your room. Even a speaker that has a good bass or subwoofer will be impacted by objects in the room that cause this echoing sound.
Look around and see if there is anything noticeable that is causing this. It could be an awkwardly shaped shelf or a cabinet with a lot of glass near the speakers themselves. Some materials will deflect sound in better ways, which brings me to my next point.
There are certain materials that will absorb and deflect sound.

Hard objects, shelves, lamps, even clocks, can all have an effect on it. If you can afford to move stuff around, the best thing you can do is to add some sort of consistent padding throughout the room. Acoustic wall panels will do just that. They are a soft material that doesn’t cause the sound to directly bounce right off of it but they are not too absorbent either.
You ultimately want to find a good balance between the materials in the room. Also, know that the floor material can have an effect too. Try adding a carpet to your room if possible (especially useful if you have floor standing speakers).
Toe-in Your Speakers
Toeing-in your speakers means that you are pointing your speaker systems at appropriate angles towards the audience. This is one of the most overlooked factors that affect overall sound quality and can be literally adjusted in seconds! Take a look below and follow the general guidelines for how to do this as optimally as possible. Doing this could be the difference between average sound and the illusion of full surround sound.
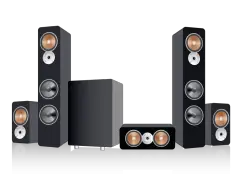
Your front speakers should be placed at a 22 – 30-degree angle inboard towards the seating area. The more speakers you have, the more you are going to have to take this into consideration.

Your speakers shouldn’t be facing the direct center of the seating area (unless you have a single soundbar). The center channel or soundbar should always be placed in the middle of the room as that was the designer’s intent with them.
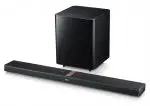
Note: Soundbars should be eye-level with the audience if possible and centered right under the TV! I would try to get it as close to this calibration as possible to get the best sound.
Change Your Seating and Subwoofer Placement
Your subwoofer placement relative to your seating is something you can be a little more flexible on. I came across a bunch of examples where people placed them right next to their couch or at an angle that is slightly off-centered from their middle couch. Subwoofers help produce a richer and more dimensional sound that accompanies what’s coming from the actual speakers. Placing them in the corner at the front of the room can actually boost its output and thus make your sound system sound way better.
How to optimally place your seating for best sound quality output:
This formula won’t apply to everyone, only those who have a large room set up. Sony came up with a quick and easy formula you can use to determine the most optimal distance to be from your speakers and your screen:
Diagonal Length of Screen x 2 = Distance from TV (convert this number to feet)
This is the MAXIMUM distance you want to be from your screen. Consider being inside this range to get the best speaker output. My projector screen is 120 inches so this formula would tell us we need to be no further than 20ft away from the center speakers. My family doesn’t have a room this big but it still works for us because we sit 10 – 15 feet away from our screen. From my experience, as long as you’re inside this range by 3-5ft, you should be getting the best quality from your speakers as possible.
Ensure Your Seating is at Least 1 Foot From The Back Wall
You don’t want your couch or theater seats directly against it. You want to give the sound a chance to be fully contained within your walls. If you don’t, the bass will get too boomy and not have a chance to be absorbed from the back wall before it hits your face.
You can get a better surround sound experience when you let ambient or lower frequency sounds bounce off the back wall when your ears are detecting them. This will also put you at a more ideal distance if you have rear-end speakers. You never want to be sitting right next to them.
You should be sitting further away from your speakers than the distance between the center /rear speakers themselves. This will give you the best sound.
In short: the listening seat should be in the area of 1.2 times the distance between the two speakers.
Check Your Cables
Composition, length, and thickness. Sometimes cables can make all the difference if you’re an audiophile. A wire’s performance is mainly affected by the three elements mentioned. Is your speaker cord longer than it needs to be and can you afford a shorter length? These concepts will be discussed in this subtopic.
If the resistance of a wire differs from a speaker’s impedance by more than 5%, you will notice a definite decline in sound quality. Before you take a second to re-read that statement, just know that speakers with less impedance (measured in ohms) are better but you need equipment that can support that. The biggest takeaway is that you might need a bigger wire than what you are using for the given Ohms of your speaker system. I highly recommend calling Best Buy or another sound company to help you with this if you think this is your issue.
The Lifewire blog made a super helpful chart to figure out what size cable you should have for your set up. This chart is meant to help you determine the wire size.
| Wire Gauge and Length for Specific Speaker Impedances | |||
|---|---|---|---|
| Wire Size | 2 Ohms | 4 Ohms | 8 Ohms |
| 22 gauge | 3 ft. | 6 ft. | 12 ft. |
| 20 gauge | 5 ft. | 10 ft. | 20 ft. |
| 18 gauge | 8 ft. | 16 ft. | 32 ft. |
| 16 gauge | 12 ft. | 24 ft. | 48 ft. |
| 14 gauge | 20 ft. | 40 ft. | 80 ft. |
| 12 gauge | 30 ft. | 60 ft. | 120 ft. |
| 10 gauge | 50 ft. | 100 ft. | 200 ft. |
Check Your Wire Material
Resistance increases with cable length and the material of the wire. Copper is the most common because it has low resistance and isn’t overly expensive. However, copper wires must be insulated so they are not exposed to copper oxide. Exposed copper wires will significantly add to the resistance of the cable and decrease the quality of the speaker. Ultimately, you don’t want to limit how much exposed wire you have on your cable regardless of the material.
Quick note: The cost of a cable doesn’t matter. A more expensive one isn’t necessarily going to work. It’s more important that your cables are in accordance with the chart above.
Use an SPL Meter to Calibrate All Your Speakers
*If your retailer did not provide you with a calibration mic or you lost it, you can use an SPL Meter.* I found a super helpful video that you can see below on how to adjust your settings. This video is by Audioholics on Youtube.
In short, you can use an SPL Meter to channel balance the dB levels of each speaker. Some speakers (such as the rear or side speakers) might need to be set to lower levels to reach the same dB as the desired level on the SPL meter (75dB is standard for home theaters).
Practical Ways to Improve Soundbar Quality

- Mute your TVs internal speakers. For the longest time, we had our TV’s speakers on level 2 or 3 along with the soundbar on a higher volume, which wasn’t enough to initially detect until we finally noticed there was a slight distortion to the audio output. There were essentially two separate speakers playing the same thing on the TV. Once we muted the TVs internal speakers and limited it to the Soundbar, the distorted echoing sound went away.
- Use an optical cable instead of an HDMI. Both of these cables are great but an optical cable is going to be a better option for optimal audio output. Optical cables will take the sound directly from the TV and output it through the Soundbar. Even though HDMI cables do the same thing, there is more resistance because they are also transmitting video signals from Netflix or FireTV. Optical cables also have fewer Ohms than HDMI cables or HDMI Arcs.
- Adjust your equalizer settings. It all comes down to treble and bass. The best way to master the balance between these two elements is to play around with it. Play a movie or TV show you recently watched and adjust the settings to see which equalizer settings sound best to your ear. If you generally watch shows that have more dialogue, then consider turning the bass down. Remember you can always adjust these settings based on what you are watching.
- See if quality improves without a receiver! A lot of older home theater setups rely heavily on a receiver to coordinate all the different sound systems in place. This might be appropriate to have for some, but if you have a Soundbar then cut it out! Soundbars are meant to be simple in design and excellent in quality and receivers will overcomplicate its functionality and compromise its quality. The more nodes your sound system has to go through before it reaches your ears, the poorer the quality will be.
Surround Sound: Quick Tips To Improve Quality

This section is meant to help you double-check yourself and make sure that you aren’t making any simple mistakes in calibration.
- If you’re gaming, make sure you have your console system set to 5.1 uncompressed. A lot of people on a Reddit thread discovered this to be their problem. By default, most gaming consoles like Xbox One or PS4 Pro don’t have their surround settings set as their default. The Nintendo Switch DOES NOT support surround sound if you use an HDMI Arc cable. While it does support 5.1 surround, you need to make sure you are hooking it up to an optical cable otherwise you won’t be able to adjust the settings.
- Turn up the rear speakers and adjust the equalizer settings. High-quality surround sound systems blend their output very well. Sometimes the surround sound isn’t noticeable but if you turn up the rear speakers a little more than the front, this could make all the difference.
- Move all of your speakers to be at a 22 or 30-degree angle facing the seating area. A lot of sources on Google will tell you that a 60-degree angle is better for your center speakers, but I’m going with Sony’s advice on this one as well as Dolby’s recommendation of 22-30 degrees. You don’t need to split hairs over which one is more ideal. Go with what works for you and even have a friend sit down and tell you as you manually adjust them. Just make sure they aren’t only facing the front of the area: have some angle with them.
- Call the speaker brand customer support if they didn’t provide you with a microphone and program to calibrate your speaker levels. Every modern surround sound retailer should supply you with a microphone and a program to calibrate all of your speakers. If for some reason you misplaced your mic or weren’t provided one, the video earlier in this article shows you how to use an SPL meter.
Related Questions
- Is a Soundbar better than a channel system? In some aspects they are, but it depends on how seriously you take your audio experiences. Soundbars are a better option if you want a simple set up or have a more limiting space for your home theater. They are also better for people with hearing loss, as they do a better job at boosting dialogue without sacrificing bass. Channel systems are good if you have a higher budget and have a set up that can accommodate multiple speakers throughout the rooms.
. - When should I upgrade my home theater sound system? Not every new product is the best and latest in sound technology. Often new sound systems from Yamaha or Dolby are incremental and don’t make a profound difference. A lot of credible Youtubers (like Audioholics in the above video) recommend that you use your system until it breaks or you can sell it. A smart strategy is to buy an older model that’s still better than your current system with your budget. You’re not missing out that much by having last year’s model.
. - What is a dB measurement? A dB is a measurement of “decibel.” The important thing to know is that home theater sound systems should be calibrated at 75dB and no more than 85dB. SPL Meters from Radioshack or Amazon can easily help you adjust your speaker ratios.
. - How do I know if my speakers are giving me the best sound possible? The best way to know is to ensure you are following all of the tips listed in this article. If you are using an optical cord for speaker output and all of your systems are set to 75dB, you can be confident you are getting the best quality sound possible.
. - Do I need 5.1 surround sound for virtual reality? Not necessarily. If you choose not to play with headphones, and your graphics card can support 5.1 Dolby surround or equivalent, that is the only factor that will determine if it is possible.
Conclusion
In this article, I went over all the things you can do to almost instantly improve your home theater sound quality. Hopefully along the way you also learned of some better ways to improve it in the future. All of these methods should be as simple as possible and by no means are they meant to be overcomplicated.
There is one really good source I want to mention in this article and that is the Audioholics channel on Youtube. The guy who runs it has no idea I exist, but I strongly recommend his content. He provides some really useful and insightful content that goes way deeper into what this article covered. I’m not the complete know-it-all when it comes to optimal sound improvement, which is where his channel can come to really good use. I’ll leave a link below to his channel if you’re interested.
As always, I’m open to any article suggestions you may have. Feel free to reach out at entertainmentden.ns@gmail.com and I’ll do my best to respond. Thank you for reading and check back occasionally for new content!
External links
This article was ultimately meant to give you some ideas on how you can improve home theater sound quality. Most of these tips can be immediately applied to your set up. If you really want to ensure you are getting the best sound possible, I also recommend my article on acoustic wall panels. It’s a short and easy guide that will help you determine if this is an upgrade you want to make.

