In this article, I’ll go over the best ways you can illuminate your home theater in all aspects. But before I do so, I want to talk about why it’s important to focus on lighting. If you have a dedicated room, you want to get the lighting right. Not only will this help you increase the quality of your screen and projector output, but it will also make it easier on your eyes. Frankly, it’ll also add another element of realism, similar to ambient light you experience at the movie theater.
If you’ve stumbled on this article, know that I respect your time and I’ve carefully put together information on how to go about this. Lighting can also be used as a means of improving the style and look of your set up. Before I start, take a look at the table of contents to see if anything particular strikes your interest. There is no specific order to go about dissecting this article.
Take the information you find valuable and anything you don’t see yourself implementing, feel free to throw it out. I definitely agree that everyone usually has a completely unique set up and some things will be more applicable to certain setups. I would say that this article will be most helpful to people who actually have a dedicated room and is already well established.
As always, if you have any further questions or comments, feel free to leave one below or reach out at entertainmentden.ns@gmail.com and I’ll do my best to respond!
Table of Contents
General Home Theater Lighting
Lighting to Increase Screen Quality
How to Make it Easy
Examples of Good Home Theater Illumination
Related Questions
General Home Theater Lighting Tips and Ideas
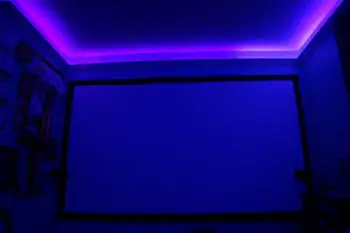
There are so many different ways you could use light as a way to decorate your set up. My favorite way to do this is through LED lights. They’re easy to set up and you can string them up around various shelves, behind screens, and under the seats. For my set up, we installed upper-level shelves and then rested the strips across all of them. The receiver sticks out a little but from the top (in the back) but for the most part it’s easy for the strips themselves to remain out of sight.


What’s also great about using LEDs is that they can change and turn any color. The lights I have in my above setup ar just for decoration. I turn them on their lowest brightness setting when I’m actually using the projector so it doesn’t impede light quality. I usually change it to a lighter blue color since there the contrast is easier to look at.
A properly lit home theater should ideally have these following qualities:
- Simple, conservative hallway lights that lead all the way to the first row if needed
- Some form of convenient lighting near tray tables and cup holders. Lights that come with a movie theater seat are best
- Lights that don’t wash out the screen from being angled directly overhead.
- Not intruded by outside light when doors open or the sun is out.
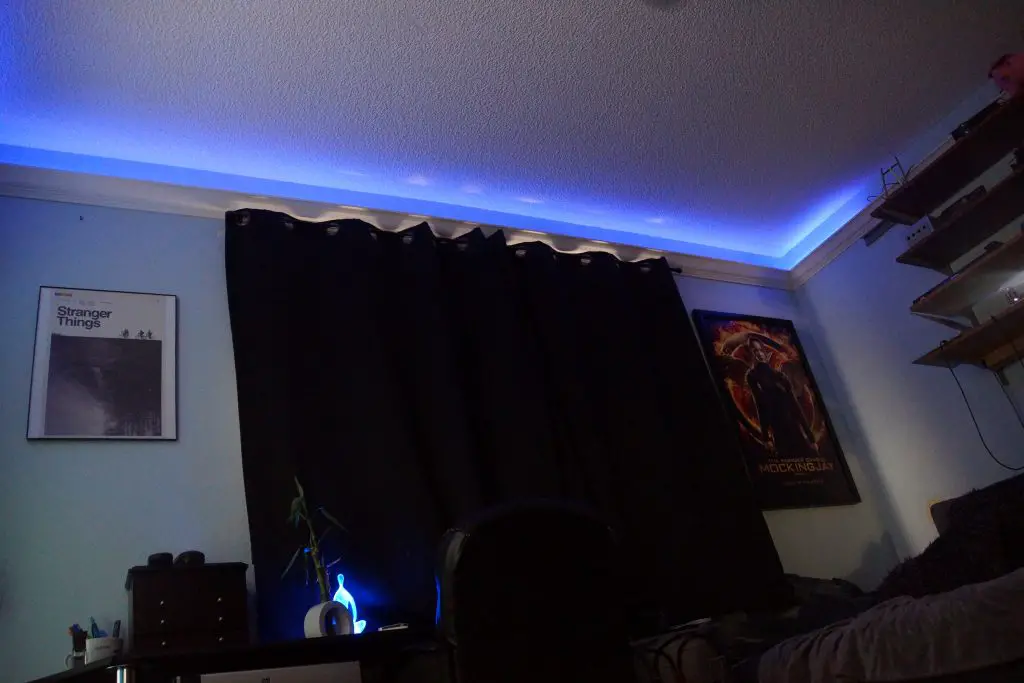
*If you’re building your own home theater almost from scratch, make sure to account for the angle of the sun hitting that room during certain parts of the day. In the above picture you can see we’re using blackout curtains that completely block out sunlight when all the way shut. These work super well and we got them on Amazon for pretty cheap.
Home Theater Sconces

Have you ever heard of these before? Chances are you haven’t BUT you’ve most definitely come across them in an actual movie theater. They’re not as fancy as they sound. But they’re awesome if you need a way to light the side paths down into your home theater. I’ve seen a lot of people going the cheap way by buying crappy outdoor pool sconce lights on Amazon but they don’t do very well when it’s indoors (most of those ones have to be battery powered).
The good news is that you can buy ones that get installed just like normal ceiling lights so the batteries won’t die! They’re expensive but completely worth it in the long run. Take a look at the resources section of this article to see a link (non-sponsored) to a good website I’ve found if you need to buy some of these.
Lighting on the Floor: is it a good idea?
Chances are you don’t have 200 seats and lengthy stairs leading up to the top-most seats like a normal movie theater. So is it worth getting home theater lighting and is it easy enough to be worth it? I think so! If you search Google for home theater stair and aisle lights you can get more than enough for your room for around $100 at most.
These would be perfect if you genuinely have a dark-lighted room or have a wet bar behind to screen. People that need to get up, get a drink, or do something else will have an extremely easy time finding their way around the seats. It also adds some authentic style and since it’s your space, you could even use RGB led lights for $50 or less. Most people spaces aren’t going to be that big, so an “industrial” roll of strip lights for $100 most likely isn’t necessary. To reiterate, a couple of strips of LED lights would be my top recommendation for lighting your aisles.
Lighting on Theater Seats
The more expensive movie theater seats will already come with fancy blue LED lights under the seats (Octane Seating loves to do this). I don’t think it’s that practical or necessary to have lights under the seats themselves unless you really want them to look cool. However, there are some helpful lighting features that seats can have.
Cup lights and tray tables are the best places to have some form of ambient lighting. Home theater seats can come with these small LED accents if you order through Elite Seating or some other higher end company. These chairs usually go for $600+ but the LED feature is a small part of the price. So what else do you do?
LED Cup Holders are the best secondary option. Ebay and Amazon have so many of these different types of products which you can find if you search the bolded part of this paragraph. You could literally slide these into the cup holders of your seat and be good to go. Some products will require some DIY installation with routing the cords but it’s totally doable. Just an idea if this seems like it’ll work for some people.
Increasing Your Screen Quality With Proper Lighting
If you’re having trouble with getting the right level of brightness or contrast from your screen, it’s most likely due to how the lighting is hitting your screen. I thought it was interesting how there are legit lighting professionals that have been interviewed online about the best practices for this. Most of what they were saying was way overcomplicated and not that applicable but they did bring up some important points worth mentioning.
When to Use Recessed or Ceiling Lighting
Recessed lighting is usually best for home theaters but there are a couple distinctions that make one more appropriate than the other if you’re looking to buy some more lighting. Recessed lighting is best if you have a low hanging ceiling and want a calmer light ambiance when they’re on. If you want some form of lighting still present and you have bulbs that sit almost directly over your screen, recessed light bulbs are the best option that could make your projector contrast a lot better.
One more useful application of recessed lighting would be if you have a wet bar on the other end of the room. If this is your case and you want to have lights on in this area while a movie is playing, it’s best to put those lights on the furthermost end of the room. This way you won’t have light pollution or any washout effect when the projector is on. Calm and ambient light that isn’t too aggressive that disperses directly over the bar would be the best form of implementation.
Lighting Behind the Screen
I attached a good video I found that shows a good installation on LED lights behind the screen. Ignore the cheesy thumbnail.
This person installed his lights in a DIY fashion, The screen doesn’t come with installed lights and in the full video, he made a frame before attaching it and mounting his screen. There is an option for getting a screen that comes with LED lights but these options are way more expensive. I think one of the easiest modifications is actually installing LED lights around your screen or near your ceiling (I can speak on this personally).
The biggest takeaway from this section is that behind screen LED lighting is a good option. It not only makes your set up look cooler but it also can help brighten the overall image contrast of your screen. Some people put legit bulb lighting behind their screen because they want more illumination but that can also dampen the image sharpness if you overdo it or have a thinner material.
CLR vs ALR Screens: Important!
If you go on Elite Screens or any other dedicated home theater screen company, you’re going to notice that they classify their screens as one of these two types.
CLR stands for Ceiling Light Rejecting. This means that overhead light bounces almost completely off the screen and looks profoundly better than a regular screen. But these ones will have their quality reduced if there is another form of light striking the surface or if ambient light is filling the room. That’s where these come in…
ALR stands for Ambient Light Rejecting. These screens will basically deflect all kinds of ambient light whether it’s coming directly overhead or from another source in the room. These are the most expensive option for home theaters but they produce fantastic quality when you look at the difference.
Ambient Light Rejecting Screens: How They Work
We’ve already talked about using recessed lighting as a more appropriate fit to home theater ceiling lighting. But you can take it another step further if you get a screen characterized as “ambient light rejecting.” This doesn’t mean that ambient lighting is bad, but rather that these screens will be able to nullify the effect of ANY lighting that hits the screen (limiting the washout effect).
It really is awesome to see the difference that these types of screens can make. I honestly encourage you to save up a little bit more and get one of these if you haven’t bought a screen yet. I would say that out of all the home theater lighting tips, this is the best option you can make for your set up. It will make all the other lighting in your theater more forgiving to projector quality and more freedom to install different types of lighting all throughout.
Mind Screen TV did a really good video that helps you see the difference in a regular screen and one that’s specific to light rejecting. The technical difference with these types of screens is literally how the polygons of the microfiber material disperse light. The surface of the screens engineered in a special way that bounces off light more effectively.
Ultimately, these screens will look a lot sharper because of this feature. And they’re not as expensive as you might think. Our regular Elite Screens 120 inch cost us about $150. On Amazon, a 100 inch light rejecting Elite Screens model cost about $500. Yes, it’s triple the price but I was expecting to pay closer to $1000 for a screen like this. It’s definitely cheaper than a 100 inch 4k TV ($2000 and up) but with the light-rejecting feature, it’s just as good as a TV that size.
Make it Easy: Automate Your Lighting with Lutron
Lutron is a “smart home” lighting company that offers exactly what you would expect a smart home lighting system to do. I think it’s super applicable to someone who wants to have wireless control over their home theater lights at the touch of a button (that could even be just on your phone). You could easily use their products to rig up all the lights in the home theater room and control them simultaneously.
I did some research on how to go about implementing these effects as well as what most people were saying in their reviews. Since it’s a special type of light switch, know that it will be more expensive. Each switch is about $50 – $60 so factor that as being to cost of a switch per lighting unit (you also have to buy a one time digital hub for $80 which organizes all the electric units). Yo would need two units in your theater room if you had independent light units throughout.
How it works
The light switches connect to a digital hub and then to your wireless router (using a wifi connection to communicate). You can technically control these switches from anywhere in the world. One important benefit to Lutron is that you don’t need smart bulbs (you can use any bulbs you want). The only unique thing you have to install is the switch. If you’re not super tech savvy like me, I would also factor in the potential cost of having expert installation.
The Lutron Caseta and Lutron Dimmers are the most applicable to home theater rooms. Some switch units can only be turned on or off while others can be dimmed to a certain setting. The dimming one is going to be the best for a media room since most people most likely won’t turn off all their lights when watching.
Examples of Good Home Theater Illumination
I like Youthman’s video tour (below) of his set up because he did the lighting really well. He also doesn’t overcomplicate explaining why he did the lighting the way he did like a lot of other YouTubers. He uses uniform recessed lighting all throughout his ceiling and sets the front lights to dim when actually using the projector. Having the LED lights around the frame also sharpens the contrast of what you’re watching on the screen to the background light.
The organization of the lighting is well thought out. He actually uses Lutron to control all of the lights in his room which saves him a lot of getting up and sitting down. You absolutely don’t have to do it this way but it’s worth implementing from the start if you’re still planning it out and have a more up to date home.
I wouldn’t really change anything about this guy’s set up other than maybe getting some LED cupholders but even those might be a little overkill. Notice that the color of his walls is appropriately conservative in nature. It’s not too bright and he has a nice semi-gloss finish on it.
I think most people would agree he doesn’t need an ambient light rejecting screen since his projector is already 4K and is capable of producing more lumens than two of my projectors combined.
Related Questions
Do the color of my walls matter for quality theater lighting? Only a little bit. Unless you have a super out-of-the-ordinary color like bright orange, most conservative, dark colors are the best option. Semi-gloss paint reflects light to some extent but it’ll ultimately make your projector seem even brighter (which can be a good thing)
Are fiber optic roof panels a good option for lighting? I wouldn’t use fiber optic panels as the main lighting source for my theater. The ones that have LEDs around the rim are conservative by nature and are more meant to be for decor than for anything else. I agree that they look super cool especially with all the different ways you can install them.
Should I have lights directly above my screen? If they are more ambient and not super bright. It’s even better if those lights can be dimmed when you’re actually watching a movie. If you have them on full blast while using the projector, the image will look a little washed out if it’s not a light rejecting screen. It’s more forgiving for TVs.
Resources
I included this section because I came across a lot of great sites that could point you in the right direction if you’re looking to implement these ideas. All of these links are non-sponsored and simply put here to be of usefulness to you.
Screen Innovations: I recommend this site primarily to people who are super serious about getting some of the most high-quality screens possible. This site is way on the more premium side of home theater products. I like how customizable you can make your order with these guys. Almost all of their screens are ambient light rejecting and can come with a built-in LED light frame. One of their most popular products is the Black Diamond Zero Edge screen.
Lutron Lighting: If you missed it in the above section, Lutron is a company that produces smart light switches (not bulbs). People use these switches to fully automate the light settings in their room and these would come in really hand for home theater lights. You can order switches to be strictly on / off or their “dim” switches. The link above will take you to their products. A good switch that has been commonly reviewed is the Lutron Maestro Wireless.
AQLIGHTING: This site is great if you need a lot of strip lights to run along the sides of your walkways or stairs. You can order a large quantity of these so this site would be more appropriate for big rooms or if you need a lot of strip lights. If you have a small room, I recommend getting a simple LED light strip instead from Amazon.
HTMarket: This is another premium site for wall lights and sconces. You can order intricately designed wall lights across a variety of themes. They also have a TON of other home theater decor related items. Some of their intricate light designs are expensive ($200+) but a lot of their designs can be fully customized. Their most interesting ones are the custom names that can be laser cut onto their sconce.
Conclusion
I know this content seems like it was a lot to digest but if you’ve made it this far then congrats! I generally think a lot of people don’t consider the best ways to light up their home theater in order to have the best experience in it. A lot of these tips shouldn’t seem too complicated to do, but I think that it takes time to really establish your room to the level that you really want it.
This article was meant to give you some ideas on how to go about illuminating your home theater. It’s more than just putting lights in the correct places and making sure it’s the right brightness. I didn’t really talk about that part too much because ultimately it’s how the light hits your screen that determines the quality of your experience. If for some reason you know you can’t do much about fixing this aspect of it because of how your basement or house is set up, I truly think that one of those Elite Screens light rejecting ones will more than do the trick. If I could go back in time I would have convinced my family to save up and buy one of these for a couple hundred more dollars.
Hopefully, some people have found this stuff useful and I did my best to draw on personal experience as well as spending a lot of hours researching this to make life easier for people who are struggling to make their lighting work. If I missed anything or if you have any questions feel free to leave a comment and I’ll do my best to respond. Thank you all for reading!